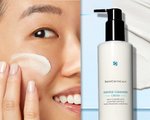
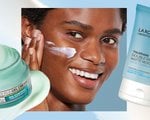
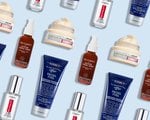
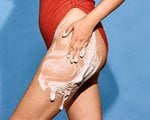
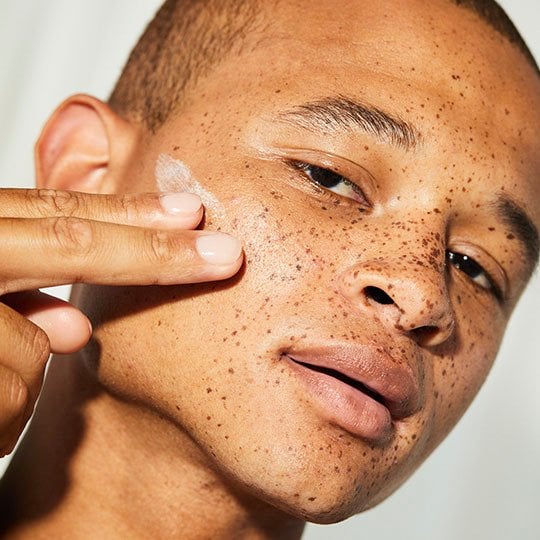
If you’ve ever heard of occlusives but are curious about their benefits, you’re not alone. In a world of buzzy skincare ingredients, deciphering the ingredient list on your favorite moisturizer can feel like a challenge. So here’s what you need to know: There are three main categories of moisturizing ingredients: emollients, humectants, and—you guessed it—occlusives. The latter of the three is often considered to be especially beneficial for dry or dehydrated skin. In this guide, we’re exploring the benefits of occlusives and sharing helpful tips for incorporating these ingredients into your skincare routine for dry skin. Keep reading for the lowdown on how occlusive moisturizers work, which skincare products fall into this category, and how to use them in your routine for hydrated, softer-feeling skin. What Are Occlusives in Skincare? You may already have some experience with occlusives and not realize it. One of the most well-known ingredients in this category is petroleum jelly (petrolatum) which can be found in countless ointments, creams, lotions, and lip balms. Occlusive moisturizers tend to have an oily or waxy texture and are generally considered to be the thickest moisturizer option. While petrolatum is often considered the best occlusive moisturizer, many other ingredients also have occlusive effects—including beeswax, dimethicone, mineral oil, lanolin, and squalene (more on these ahead). Occlusive moisturizers have gained popularity in recent years due to the rise of skincare trends for dry skin like slugging—a technique that involves applying an occlusive as the final step in your nighttime skincare routine to seal in moisture. With that said, occlusives have been a mainstay in moisturizing products for decades, with petrolatum first being patented for cosmetic use in 1872. How Do Occlusive Moisturizers Benefit Dry Skin? Unlike humectant moisturizers, occlusives don’t hydrate your skin. Instead, they sit on your skin’s surface, creating a physical barrier that helps prevent transepidermal water loss (TEWL). In plain English: They trap moisture in your skin and keep it from evaporating off your skin’s surface (the definition of occlusive is literally “something that obstructs”). The result? Occlusives can help your skin retain moisture for longer, making them especially helpful for dry skin. One clinical study found that participants who used occlusive moisturizers saw a sustained improvement in skin hydration after just five days. According to the American Academy of Dermatology (AAD), occlusive ointments may be less irritating and more effective options for those with dry skin. Because they provide your skin with a protective barrier, occlusives may also help protect dry skin from irritants and allergens in the environment. This is why you’ll find occlusives used in many skin protectants, such as CeraVe Healing Ointment. The protective layer created by occlusive ingredients can also be especially beneficial during the harsh winter months when your skin is exposed to freezing temperatures and dry air. Popular Occlusive Ingredients for Dry Skin While some occlusive ingredients can be found in their purest form (such as petroleum jelly), others are included in skincare formulations alongside popular humectants and emollients, like hyaluronic acid and glycerin, for added benefits. Here are some examples of common occlusive ingredients used in moisturizers for dry skin: Oils and oil-based waxes: These types of occlusives include mineral oil, paraffin, and petrolatum (petroleum jelly). Research shows that petrolatum is the most effective occlusive moisturizer, with the ability to reduce transepidermal water loss by more than 98%. Silicones and silicone derivatives: Some silicones used in skincare formulations, like dimethicone, are also well-known for their occlusive properties. You’ll find dimethicone in many rich creams, including L’Oréal Paris Revitalift Triple Power Anti-Aging Overnight Mask. Wax esters: These include ingredients like lanolin and beeswax, the latter of which is commonly found in lip balms, like Kiehl’s Butter Mask For Lips. Vegetable waxes: Certain vegetable waxes, including carnauba wax, have semi-occlusive properties that can help seal in moisture for softer, smoother skin. Vegetable oils: Some vegetable oils, such as shea butter, squalane, and coconut oil, may also offer semi-occlusive benefits. Look for shea butter in rich, nourishing body lotions like Youth to the People Superberry Firm and Glow Body Butter. How To Incorporate Occlusives Into Your Routine If your skin feels perpetually parched or you’re experiencing seasonal dryness, it may be time to include an occlusive product in your routine. It’s likely that your moisturizer may already contain one or more occlusives, so how can you be sure that you’re getting the most out of these ingredients? Here are a few tips to help you get started. Occlusive moisturizers should generally be applied onto slightly damp skin as the last step in your skincare routine. For dry, flaky patches of skin on your body, a pure occlusive (like petroleum jelly) or ointment may be preferable for targeted relief. Remember to apply it to damp skin to help trap in much-needed moisture. Apply an occlusive ointment onto exposed areas of skin before heading outdoors in the winter—this can help protect your skin against the drying effects of harsh winter weather. Try applying a petrolatum-based ointment on dry eyelids, cuticles, heels, and lips to help combat dryness in these areas. Pure petroleum jelly may feel too heavy or greasy for your facial skincare needs. For this reason, we suggest opting for facial moisturizers that include a combination of occlusives, humectants, and emollients. If your dry skin doesn’t improve with consistent use of occlusive ointments and moisturizers, it’s best to speak with a board-certified dermatologist. They can assess your dry skin and offer the right solution for your needs. 8 Moisturizers To Try for Dry Skin Check out some of our favorite moisturizers for dry skin that feature occlusive ingredients, below. Kiehl’s Ultra Facial Cream with Squalane This iconic face cream is a staple in many of our editors’ routines, and it’s not hard to see why. The ultra-hydrating formula features 4.5% squalane, pro-ceramides, glacial glycoprotein, dimethicone, and apricot seed oil. It’s formulated to be suitable for all skin types (including sensitive skin) and, with continued use, can help you achieve softer, smoother, and visibly healthier-looking skin. CeraVe Healing Ointment Ultra-dry skin calls for a heavy-duty treatment, and that’s where CeraVe’s Healing Ointment comes in. The non-greasy formula contains petrolatum, as well as a slew of other useful ingredients for dry skin, including ceramides, hyaluronic acid, and dimethicone. It’s designed to help hydrate and soothe very dry skin, but the fragrance-free formula can also be used as a skin protectant for chafed, cracked, or chapped skin. And despite its ultra-rich texture, the ointment is non-comedogenic, which means it won’t clog your pores. La Roche-Posay Lipikar AP+M Triple Repair Body Moisturizer for Dry Skin La Roche-Posay’s Lipikar lotions come in several variations, but this is one of our favorites for dry skin. The triple repair formula provides dry, rough skin with up to 48 hours of hydration and helps restore the skin’s protective barrier. Standout ingredients in this body cream include niacinamide, glycerin, shea butter, ceramides, and La Roche-Posay prebiotic thermal water. SkinCeuticals Hydra Balm For severely dry or compromised skin, reach for this occlusive balm from SkinCeuticals. It contains pure petrolatum to help seal in moisture, plus aloe vera and squalene. The TSA-approved packaging makes it a great option for moisturizing dry skin on the go, and it’s even approved to help protect and nourish post-procedure skin. L’Oréal Paris Age Perfect Hydra Nutrition Honey Night Balm Instead of slugging with pure petroleum jelly, consider reaching for this luxurious night balm. It contains Manuka honey extract, nurturing oils, calcium, and antioxidants, and melts into the skin, providing long-lasting, non-greasy hydration. With consistent use over time, it also helps firm and strengthen dry, mature skin in need of moisture. La Roche-Posay Cicaplast Balm B5 Reach for this multi-purpose balm if you are looking for a gentle moisturizer that helps relieve cracked, chapped, and chafed skin. The formula is designed to provide daily relief for dry to very dry skin, and it can even be used on baby’s skin to help treat and prevent diaper rash. It’s also packed with beneficial ingredients for dry skin, including 1% dimethicone, panthenol (vitamin B5), shea butter, glycerin, and of course, La Roche-Posay’s signature prebiotic thermal water. Kiehls Super Multi-Corrective Anti-Aging Cream for Face and Neck Combat dryness and target age-related skin concerns with this supercharged moisturizer. It contains shea butter, hyaluronic acid, and vitamin E and helps even skin tone, smooth skin texture, and reduce the look of wrinkles. Try applying it on your face and neck day and night for more youthful-looking, hydrated skin. Skinceuticals Eye Balm We suggest giving this hydrating eye cream a try if you deal with under-eye puffiness or crow’s feet wrinkles. The delicate skin under your eyes requires special care and this formula is designed to restore essential lipids that can nourish dry skin around the eyes. This formula features ingredients like aloe, vitamin E, and several occlusives, such as paraffin, petrolatum, and dimethicone. Who Shouldn’t Use Occlusives? Because occlusives often have a thick, wax-like consistency, the American Academy of Dermatology (AAD) recommends avoiding them if you have oily or blemish-prone skin. When in doubt, consult a board-certified dermatologist to see if occlusive skincare products are a good fit for your skin’s needs. Next Up: How To Use Humectants in the Winter