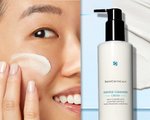
If I had to choose between makeup or nail polish, I’d choose nail polish every time—seriously, I feel naked without it. That being said, I have always wanted to try a bare manicure—but, am too embarrassed of my yellow-looking nails. That is, until essie Polish sent me a complimentary sample of the brand’s Color Corrector For Nails primer to test and review on behalf of our Skincare.com readers. Curious to know how it turned out? Keep reading! Similar to that of a base coat, this color correcting nail primer can be used before a negative space nail art manicure, or on its own for a more naked look. At first glance—i.e. before I tested a swatch on my thumbnail—the formula looked as though it was a creamy—yet translucent—ivory shade with a bit of shimmer. But, when I gave it a quick, one-nail pre-manicure test, I noticed that the formula was actually quite sheer, making it perfect for a naked manicure look. What’s more? My nail appeared less yellow-looking, too! This is because those bits of shimmer are actually super small color correcting pearls that can reflect light and give nails a healthy-looking glow. Feeling confident in the power of color correction—and excited to take a break from my yellow-looking nails—I went ahead and gave myself an at-home manicure with the Color Corrector For Nails primer. The result? Naked-looking nails that have a healthy glow that neutralize yellowing or discoloration. essie Polish Color Corrector For Nails, $10 MSRP The best part about the Color Corrector For Nails (aside from the fact that it can neutralize the look of yellow nails)? You don’t need to book an appointment at a fancy salon to achieve great-looking nails! Learn how to color correct your nails with our at-home color correction manicure tutorial, ahead. WHAT YOU’LL NEED: ●      essie Polish Apricot Cuticle Oil   ●      An orangewood stick   ●      A small bowl ●      A nail file ●      essie Color Corrector For Nails ●      essie Polish Good To Go Top Coat (optional) WHAT YOU’LL DO: Before you begin your at-home manicure, you’ll want to make sure that you remove any and all traces of nail polish with nail polish remover and a cotton ball. After you remove your polish, it’s time to shape with a nail file. If your nails are already the shape and length you want them to be at, feel free to skip this step. Next, soak your nails in warm, soapy water for a few minutes. The warm water can help soften and clean your nails and cuticles and make it easier to push them back with an orangewood stick. Once you’re done soaking, , reach for an orangewood stick and gently push the cuticle back towards the root of the nail. Next, grab essie Polish Color Corrector For Nails and apply 1-2 coats on each nail. If you want to add some shine to your manicure, try topping things off with a top coat. We recommend essie Polish Good To Go Top Coat.PRO TIP: to keep cuticles feeling soft, dab some of essie Apricot Cuticle Oil onto your cuticles to help protect them from drying.